
KMLのCOLORに使われるAABBGGRR
AA:alpha
BB:Blue
GG:Green
RR:Red
だけど、何かRGBが染み付いた体には分かりにくいので、以下のサイトが参考になる
Zonum Solutions
ApacheとTOMCATを連携(Windows)
TOMCATは単独でWEBサーバーとして機能するが、今回はApacheとの連携を設定。
※TOMCATのインスト-ルについてはGeoServerをインストールを参照
Apache、TOMCATのバージョン
| Apache | 2.2.25 httpd-2.2.25-win32-x86-openssl-0.9.8y.msi Apacheは正式には64bit版は存在しないので32bit版を使用 |
| TOMCAT | 7.0.47 |
Apacheのインストール
Apacheのサイトよりインストーラ「httpd-2.2.25-win32-x86-openssl-0.9.8y.msi」をダウンロードして実行。
インストールは全てデフォルトのまま実行
よって「C:\Program Files (x86)\Apache Software Foundation\Apache2.2」にインストールされる
TOMCATの設定
TOMCATのプロトコル(AJP/1.3)の待ちうけポートを確認
TOMCATの設定ファイル
C:\Program Files\Apache Software Foundation\Tomcat 7.0\conf\Server.xml
[code]
<!– Define an AJP 1.3 Connector on port 8009 –>
<Connector port="8009" protocol="AJP/1.3" redirectPort="8443" />
[/code]
Apacheの設定
Apacheの設定ファイル「C:\Program Files (x86)\Apache Software Foundation\Apache2.2\conf\httpd.conf」を
以下に従って編集
以下の2行のコメントを外す
[code]
#LoadModule proxy_module modules/mod_proxy.so
#LoadModule proxy_ajp_module modules/mod_proxy_ajp.so
[/code]
以下をhttpd.confに追加
[code]
<IfModule mod_proxy_ajp.c>
<Location />
ProxyPass ajp://localhost:8009/
</Location>
</IfModule>
[/code]
ブラウザ上で以下のURLを開くと、localhost:8009にマッピングされる
http://ホスト名orIPアドレス/
※ちなみにhttp://ホスト名orIPアドレス/tomcatをlocalhost:8009にマッピングした時は
httpd.confを以下のように修正
[code]
<IfModule mod_proxy_ajp.c>
<Location /tomcat/>
ProxyPass ajp://localhost:8009/
</Location>
</IfModule>
[/code]
LOG4PHPで出力フォーマットに日付を指定したらエラー
LOG4PHPで出力フォーマットを指定しないとログには日時は出力されない
以下はLOG4PHPに渡す設定ファイル(config.xml)の内容
[code]
<configuration xmlns="http://logging.apache.org/log4php/">
<appender name="myAppender" class="LoggerAppenderFile">
<param name="file" value="c:/phplog/myLog.log" />
</appender>
<root>
<appender_ref ref="myAppender" />
</root>
</configuration>
[/code]
設定ファイルを以下に変更して日時を出力指定する
[code]
<configuration xmlns="http://logging.apache.org/log4php/">
<appender name="myAppender" class="LoggerAppenderFile">
<layout class="LoggerLayoutPattern">
<param name="conversionPattern" value="%d %-5p %m%n" />
</layout>
<param name="file" value="c:/phplog/myLog.log" />
</appender>
<root>
<appender_ref ref="myAppender" />
</root>
</configuration>
[/code]
すると以下のエラーが表示された
Warning: date(): It is not safe to rely on the system's timezone settings.
You are *required* to use the date.timezone setting or the date_default_timezone_set() function.
In case you used any of those methods and you are still getting this warning, you most likely misspelled the timezone identifier.
We selected 'Asia/Tokyo' for '9.0/no DST' instead in C:\Program Files\Apache Software Foundation\Tomcat 7.0\webapps\php\php\log4php\pattern\LoggerPatternConverterDate.php on line 74 Warning: date():
It is not safe to rely on the system's timezone settings.
You are *required* to use the date.timezone setting or the date_default_timezone_set() function. In case you used any of those methods and you are still getting this warning, you most likely misspelled the timezone identifier.
We selected 'Asia/Tokyo' for '9.0/no DST' instead in C:\Program Files\Apache Software Foundation\Tomcat 7.0\webapps\php\php\log4php\pattern\LoggerPatternConverterDate.php on line 74
メッセージに従ってphp.iniに以下を追加して対応
date.timezone = Asia/Tokyo
C#(Npgsql)でPostgresqlに大量データを追加
PostgresqlにNpgsqlを使用してデータを追加するには一般的にはNpgsqlCommandでINSERTを実行。
しかし大量のデータを追加するにはこれでは時間がかかりすぎる。
その為Postgresqlのコピー機能のラッパーであるNpgsqlCopyInの使い方を記載。
Postgresqlのコピー機能についてはこちら
追加対象のテーブル
[code]
CREATE TABLE tbl_test
(
rec_no decimal(6,0) NOT NULL,
rec_name varchar(60) NOT NULL,
add_dt timestamp without time zone NOT NULL,
CONSTRAINT pkey_tbl_test PRIMARY KEY
(
rec_no
)
)
WITH (
OIDS=FALSE
);
[/code]
追加用データCSVファイル
文字コードはUTF8
改行はCRLF
デリミタはタブ
[code]
1 NAME1 2013-09-26 00:00:00
2 NAME2 2013-09-26 00:00:00
3 NAME3 2013-09-26 00:00:00
[/code]
以下はコード
[code]
using System;
using System.Collections.Generic;
using System.Linq;
using System.Text;
using System.Data;
using System.IO;
using Npgsql;
namespace pcopy
{
class Program
{
static void Main(string[] args)
{
NpgsqlConnection conn = new NpgsqlConnection("Server=ホスト名;User id=ID;password=パスワード;Database=DB名;SyncNotification=true;");
conn.Open();
FileStream fs = File.OpenRead(@"CSVファイルのフルパス");
NpgsqlCommand command = new NpgsqlCommand("COPY tbl_test FROM STDIN", conn);
NpgsqlCopyIn cin = new NpgsqlCopyIn(command, conn, fs);
cin.Start();
cin.End();
}
}
}
[/code]
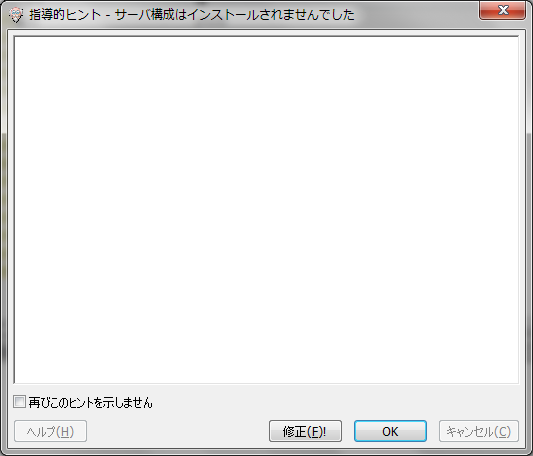
pgadminで指導メッセージ
pgadminIIIを使用してリモートDBに接続すると以下の画面「サーバ構成はインストールされていません」が表示された
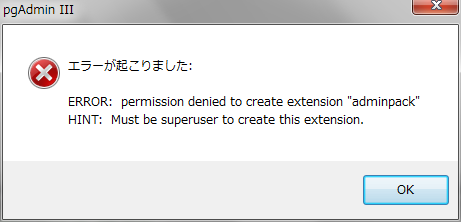
画面上の修正ボタンを押すと今後は以下の画面が表示された
ERROR:permission denied to create extension “adminpack”
HINT: Must be superuser ocreate this extention
adminpackの詳細
adminpackは、pgAdminやその他の管理・運用ツールがサーバログファイルの遠隔管理を行うなどの、
追加的な機能を提供できるようにするための数多くのサポート機能を提供します。
adminpackにより実装された機能はスーパーユーザのみが実行可能です。
以下がそれらの機能一覧です。
int8 pg_catalog.pg_file_write(fname text, data text, append bool)
bool pg_catalog.pg_file_rename(oldname text, newname text, archivename text)
bool pg_catalog.pg_file_rename(oldname text, newname text)
bool pg_catalog.pg_file_unlink(fname text)
setof record pg_catalog.pg_logdir_ls()
int8 pg_catalog.pg_file_read(fname text, data text, append bool)
bigint pg_catalog.pg_file_length(text)
int4 pg_catalog.pg_logfile_rotate()
対応方法
対象のDBに管理者で接続して以下のコマンドを実行
create extension adminpack;
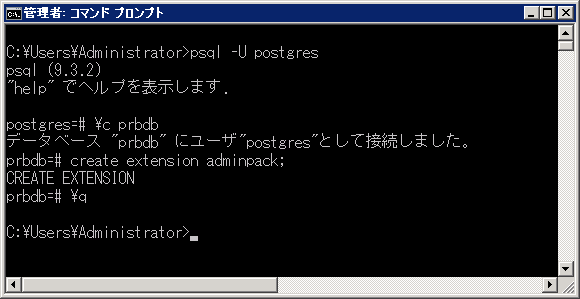
以上で対応完了。
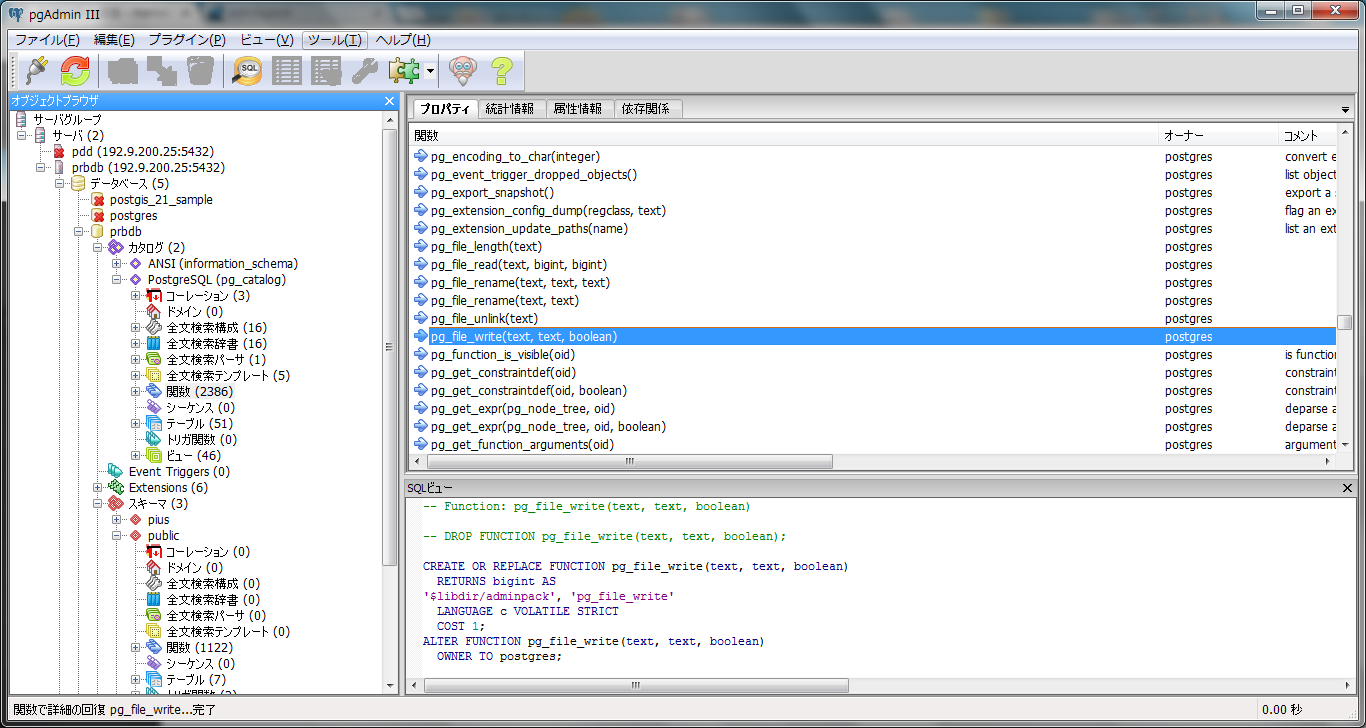
pgadminでも指導のメッセージが表示されなくなり、pgadminで確認するとadminpackの関数が実装されている
PostgreSQL(9.3 Windows)に他ホストから接続
PostgreSQLはデフォルトではローカルホストからのみ接続が可能
他ホストからの接続を許可するには以下の設定を行う
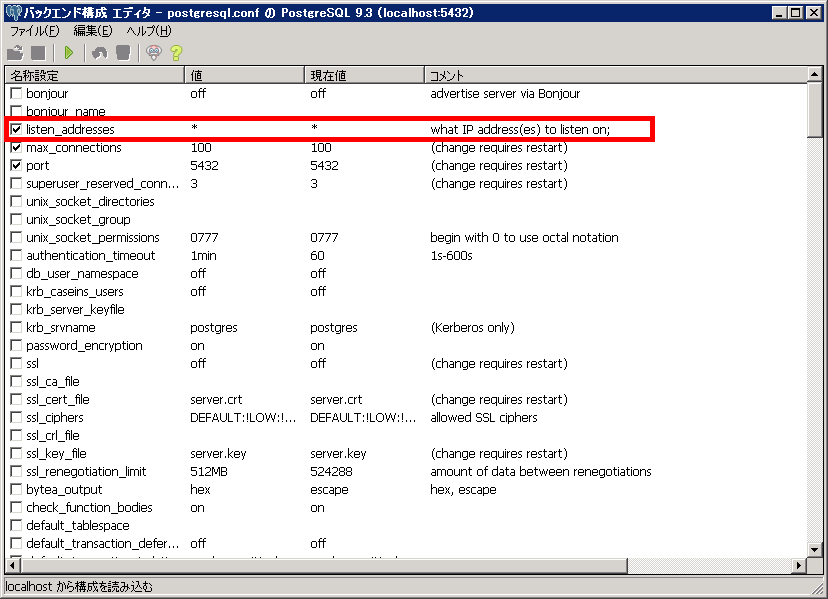
postgresql.confの編集
C:\Program Files\PostgreSQL\9.3\data\postgresql.confを編集して他のホストからの接続を許可
listen_addresses = '*'
listen_addressesがコメントにされていたり、listen_addressesにlocalhostが設定されていると他ホストからの接続ができない
実際にはpostgresql.confを直接編集せずにpgadminを使用して編集
「ツールメニュー」-「サーバ構成」-「postgresql.conf」を選択してpostgresql.confの編集画面を表示
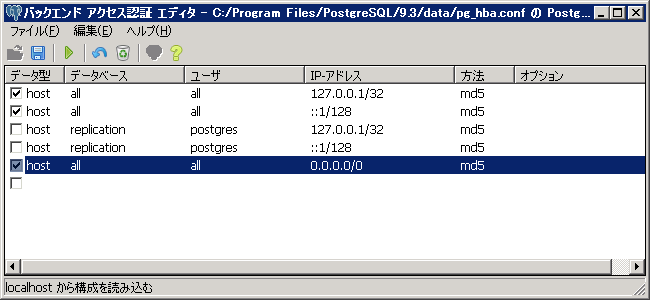
pg_hba.confの編集
C:\Program Files\PostgreSQL\9.3\data\pg_hba.confを編集して他のホストからの接続を許可
以下の1行を追加
# TYPE DATABASE USER ADDRESS METHOD

host all all 0.0.0.0/0 md5
METHODの設定値について
| trust | パスワード認証を行わない |
| md5 | パスワードをmd5で簡易暗号化して転送して認証 |
| password | パスワードをテキストで転送して認証 |
pg_hba.confも通常は直接編集せずにpgadminを使用して編集
「ツールメニュー」-「サーバ構成」-「pg_hba.conf」を選択してバックエンド アクセス認証エディタを表示
メールの転送許可の設定
WindowsサーバーからPHPでメールを送信するためにLinuxサーバー上のSendmailを転送を許可してSMTPサーバーとして使用する
sendmail.cfをインストール
yum install sendmail-cf
/etc/mail/sendmail.mcを編集
編集前
dnl DAEMON_OPTIONS(`Port=smtp,Addr=127.0.0.1, Name=MTA')dnl

dnl MASQUERADE_AS(`mydomain.com')dnl

dnl FEATURE(masquerade_envelope)dnl
編集後
DAEMON_OPTIONS(`Port=smtp,Name=MTA')dnl

MASQUERADE_AS(`自分のドメイン')dnl

FEATURE(masquerade_envelope)dnl
編集後、sendmail.mc をsenmail.cfに変換
m4 sendmail.mc > sendmail.cf
/etc/mail/accessに以下の行を追加して他ホストからの接続を許可
Connect:192.9.200 RELAY
以下のコマンドでaccessをaccess.dbに変換
makemap hash access.db < access
sendmailの再起動で完了
※ちなみにWindows上のphp.iniではsmtpにsendmailを設定したPCのアドレスを設定
yumの履歴を表示
yumの履歴は以下に保存されている
/var/log/yum.log
GeoServer上のラインをOpenLayersに色分け表示
GeoServer上に鉄道のデータをインポート
これを鉄道会社の種別(1~5)ごとに色分けしてOpenLayers上に表示
当初はOpenLayersのスタイルで対応を行おうとしたが、どうもこれはOpenLayers.Layer.WMSには使えないみたい
結局、GeoServerの機能でスタイルを作成してレイヤにスタイルを設定して解決
以下のスタイルを作成
[code]
<?xml version="1.0" encoding="ISO-8859-1"?>
<StyledLayerDescriptor version="1.0.0"
xsi:schemaLocation="http://www.opengis.net/sld StyledLayerDescriptor.xsd"
xmlns="http://www.opengis.net/sld"
xmlns:ogc="http://www.opengis.net/ogc"
xmlns:xlink="http://www.w3.org/1999/xlink"
xmlns:xsi="http://www.w3.org/2001/XMLSchema-instance">
<NamedLayer>
<Name>railroad ex</Name>
<UserStyle>
<Title>SLD Cook Book: railroad ex</Title>
<FeatureTypeStyle>
<Rule>
<Name>rail-1</Name>
<ogc:Filter>
<ogc:PropertyIsEqualTo>
<ogc:PropertyName>n02_002</ogc:PropertyName>
<ogc:Literal>1</ogc:Literal>
</ogc:PropertyIsEqualTo>
</ogc:Filter>
<LineSymbolizer>
<Stroke>
<CssParameter name="stroke">#009933</CssParameter>
<CssParameter name="stroke-width">2</CssParameter>
</Stroke>
</LineSymbolizer>
</Rule>
</FeatureTypeStyle>
<FeatureTypeStyle>
<Rule>
<Name>rail-2</Name>
<ogc:Filter>
<ogc:PropertyIsEqualTo>
<ogc:PropertyName>n02_002</ogc:PropertyName>
<ogc:Literal>2</ogc:Literal>
</ogc:PropertyIsEqualTo>
</ogc:Filter>
<LineSymbolizer>
<Stroke>
<CssParameter name="stroke">#0055CC</CssParameter>
<CssParameter name="stroke-width">3</CssParameter>
</Stroke>
</LineSymbolizer>
</Rule>
</FeatureTypeStyle>
<FeatureTypeStyle>
<Rule>
<Name>rail-3</Name>
<ogc:Filter>
<ogc:PropertyIsEqualTo>
<ogc:PropertyName>n02_002</ogc:PropertyName>
<ogc:Literal>3</ogc:Literal>
</ogc:PropertyIsEqualTo>
</ogc:Filter>
<LineSymbolizer>
<Stroke>
<CssParameter name="stroke">#FF0000</CssParameter>
<CssParameter name="stroke-width">6</CssParameter>
</Stroke>
</LineSymbolizer>
</Rule>
</FeatureTypeStyle>
<FeatureTypeStyle>
<Rule>
<Name>rail-4</Name>
<ogc:Filter>
<ogc:PropertyIsEqualTo>
<ogc:PropertyName>n02_002</ogc:PropertyName>
<ogc:Literal>4</ogc:Literal>
</ogc:PropertyIsEqualTo>
</ogc:Filter>
<LineSymbolizer>
<Stroke>
<CssParameter name="stroke">#FF0000</CssParameter>
<CssParameter name="stroke-width">6</CssParameter>
</Stroke>
</LineSymbolizer>
</Rule>
</FeatureTypeStyle>
<FeatureTypeStyle>
<Rule>
<Name>rail-5</Name>
<ogc:Filter>
<ogc:PropertyIsEqualTo>
<ogc:PropertyName>n02_002</ogc:PropertyName>
<ogc:Literal>5</ogc:Literal>
</ogc:PropertyIsEqualTo>
</ogc:Filter>
<LineSymbolizer>
<Stroke>
<CssParameter name="stroke">#FF0000</CssParameter>
<CssParameter name="stroke-width">6</CssParameter>
</Stroke>
</LineSymbolizer>
</Rule>
</FeatureTypeStyle>
</UserStyle>
</NamedLayer>
</StyledLayerDescriptor>
[/code]
上記のスタイルをレイヤに関連付けて対応
念の為、OpenLayersのスタイルについて
[code]
new OpenLayers.StyleMap({
"default": new OpenLayers.Style({
strokeColor: "white",
strokeWidth: 1
}, {
rules: [
new OpenLayers.Rule({
filter: new OpenLayers.Filter.Comparison({
type: OpenLayers.Filter.Comparison.LESS_THAN,
property: "shape_area",
value: 3000
}),
symbolizer: {
fillColor: "olive"
}
}),
new OpenLayers.Rule({
elseFilter: true,
symbolizer: {
fillColor: "navy"
}
})
]
})
})
[/code]
スタイルの変更
スタイルはGeoServer上で予めレイヤに設定する。
以下の書式でJavaScript側からも変更が可能
※GeoServer上でrailroad2というスタイルを作成済み
[code]
railroad = new OpenLayers.Layer.WMS(
"Tokyo:railroad", "../geoserver/Tokyo/wms",
{
STYLES: ‘railroad2’,
LAYERS: ‘Tokyo:VIEW_RAILROAD’,
format: ‘image/png’,
transparent: true,
viewparams: ‘road_type:2’
},
{
singleTile: true,
ratio: 1,
isBaseLayer: false,
yx : {‘EPSG:4326’ : true}
}
);
[/code]
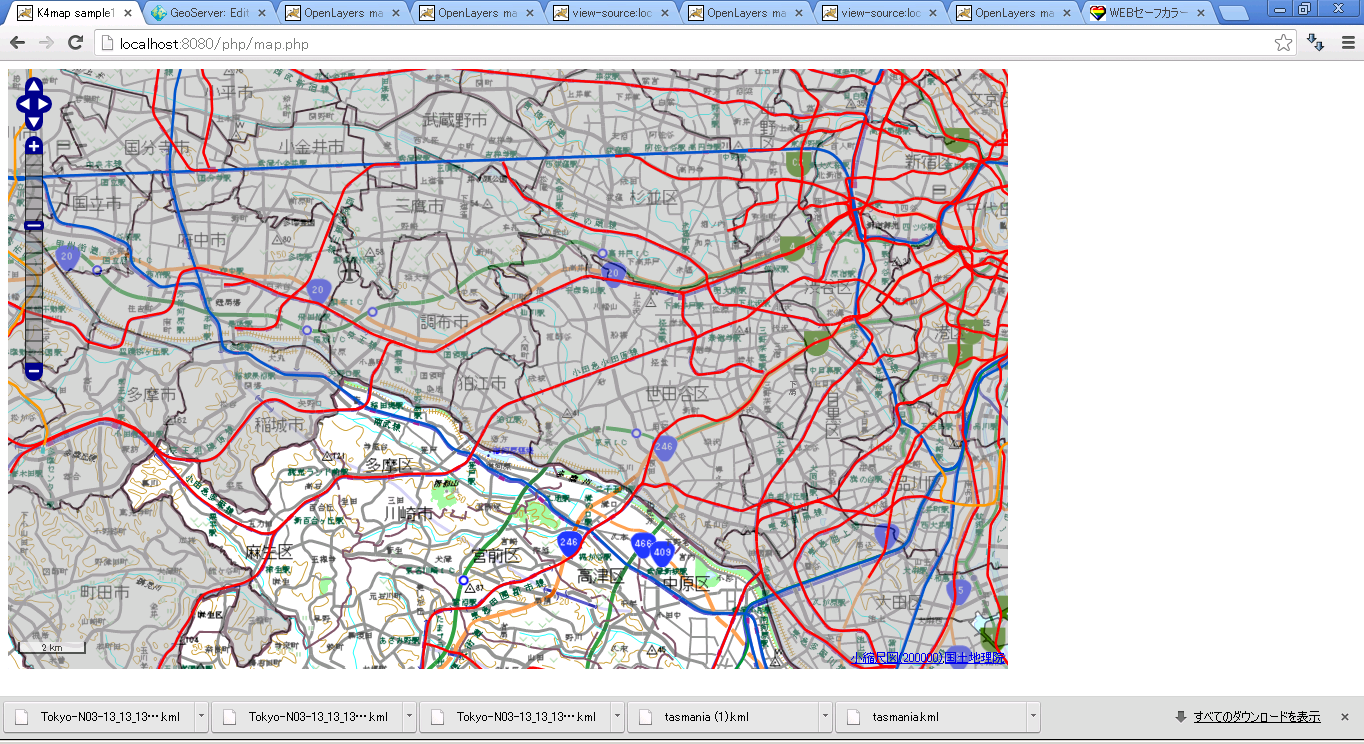
OpenLayersに電子国土(背景)とGeoServer上の行政ポリゴンを表示
以下はソース
[code]
<html>
<head>
<meta http-equiv="Content-Type" content="text/html; charset=utf-8">
<title>K4map sample1-0</title>
<script type="text/javascript" src="http://portal.cyberjapan.jp/sys/OpenLayers-2.11/OpenLayers.js" charset="UTF-8"></script>
<script type="text/javascript" src="./lib/webtis_v4.js" charset="UTF-8"></script>
<link rel="stylesheet" href="http://portal.cyberjapan.jp/sys/v4/css/webtis.css" type="text/css">
<link rel="stylesheet" href="./css/theme/default/style.css" type="text/css">
<script type="text/javascript">
var cyber;
/*
var initCX = 139.1932638; // 初期中心:黒檜山(群馬県赤城山の最高峰)
var initCY = 36.56036769; // 初期中心:黒檜山(群馬県赤城山の最高峰)
var initScale = 16; // ここでは1~18までの数値、18を入れると白紙になる
*/
var initScale = 6; // ここでは1~18までの数値、18を入れると白紙になる
//初期の経度
var initCX = 139.4;
//初期の緯度
var initCY = 35.4;
//初期のズームレベル
//※ここで設定するズームレベルはデータセットの最小ズームレベルが0になる
//※デフォルトデータセットでは「ズームレベル5」が0になる
var initZoomLv = 0;
//真球メルカトル投影(電子国土WebシステムVer.4もこれに準拠)を定義
var projection900913 = new OpenLayers.Projection("EPSG:900913");
//真球メルカトル投影(電子国土WebシステムVer.4もこれに準拠)を定義
var projection3857 = new OpenLayers.Projection("EPSG:3857");
//等経緯度投影を定義
var projection4326 = new OpenLayers.Projection("EPSG:4326");
function init(){
//真球メルカトル投影のときの最大範囲(単位はm)
var maxExtent = new OpenLayers.Bounds(-20037508, -20037508, 20037508, 20037508);
//真球メルカトル投影のときの最大範囲に範囲を制限
var restrictedExtent = maxExtent.clone();
//真球メルカトル投影のときの最大解像度
var maxResolution = 156543.0339;
//地図表示画面のオプション設定
var options = {
//「controls」を設定することで、デフォルトのコントロールを破棄してコントロールを再設定
controls: [
//地図マウスイベントのハンドル設定。
new OpenLayers.Control.Navigation({mouseWheelOptions: {interval: 100}}),
//左上のパンズームバーを設定
new OpenLayers.Control.PanZoomBar(),
//キーボードをデフォルトに設定
new OpenLayers.Control.KeyboardDefaults(),
//国土地理院著作表示
//※OpenLayrsサイトを作るときは必ずこれを書くこと
new OpenLayers.Control.Attribution()
],
//背景地図の地理座標系
projection: projection900913,
//表示の地理座標系
displayProjection: projection4326,
//背景地図の単位
units: "m",
//背景地図の最大解像度
maxResolution: maxResolution,
//背景地図の最大範囲
maxExtent: maxExtent,
//背景地図の表示制限範囲
restrictedExtent: restrictedExtent
};
//OpenLayers APIのMapクラスからインスタンスを作成
cyber = new OpenLayers.Map(‘cambus’, options);
//スケールバーコントロール表示(最大ピクセル150、下段単位無、EPSG:900913)
cyber.addControl(new OpenLayers.Control.ScaleLine({maxWidth:150,bottomOutUnits: "", bottomInUnits: "",geodesic:true}));
//背景地図のデフォルトデータセットを定義
var dataSet = {
5:{dataId:"JAIS"},
6:{dataId:"JAIS"},
7:{dataId:"JAIS"},
8:{dataId:"JAIS"},
9:{dataId:"BAFD1000K"},
10:{dataId:"BAFD1000K"},
11:{dataId:"BAFD1000K"},
12:{dataId:"BAFD200K"},
13:{dataId:"BAFD200K"},
14:{dataId:"BAFD200K"},
15:{dataId:"DJBMM"},
16:{dataId:"DJBMM"},
17:{dataId:"DJBMM"},
18:{dataId:"FGD"}
};
//電子国土WebシステムVer.4背景地図レイヤーインスタンスを作成。
//上で定義したデータセットを利用
webtisMap = new webtis.Layer.BaseMap("webtismap",{dataSet:dataSet});
//背景地図レイヤーをMapに追加
cyber.addLayer(webtisMap);
untiled = new OpenLayers.Layer.WMS(
"Tokyo:N03-13_13_130401 – Untiled", "../geoserver/Tokyo/wms",
{
LAYERS: ‘Tokyo:N03-13_13_130401’,
STYLES: ”,
format: ‘image/png’,
transparent: true
},
{
opacity: 0.5,
singleTile: true,
ratio: 1,
isBaseLayer: false,
yx : {‘EPSG:4326’ : true}
}
);
cyber.addLayer(untiled);
//初期の中心座標を指定(経緯度で入力して、内部的に真球メルカトル座標に変換して表示)
cyber.setCenter(new OpenLayers.LonLat(initCX,initCY).transform(projection4326,projection900913), initZoomLv);
}
</script>
</head>
<body onload="init();">
<div id="cambus" style="width:1000px;height:600px;"></div>
</body>
</html>
[/code]
表示例
