ホーム » Python
「Python」カテゴリーアーカイブ

Pythonのパッケージ
インストール済のパッケージの一覧
[code]
pip list
[/code]
パッケージの詳細表示
[code]
pip show パッケージ名
[/code]
[code]
(flask_app) [centos@ik1-438-51291 app]$ pip show Flask-JWT-Extended
Name: Flask-JWT-Extended
Version: 3.25.1
Summary: Extended JWT integration with Flask
Home-page: https://github.com/vimalloc/flask-jwt-extended
Author: Landon Gilbert-Bland
Author-email: landogbland@gmail.com
License: MIT
Location: /home/centos/app/flask_app/lib/python3.6/site-packages
Requires: Werkzeug, Flask, PyJWT, six
Required-by:
(flask_app) [centos@ik1-438-51291 app]$
[/code]
pipのアップデート
[code]
pip install –upgrade pip
[/code]
classのファイルパスを求める
C:\OSGeo4W\apps\Python37\libにあるパッケージ「tdkaoku」内のモジュール「kaoku_core」にあるMasterprojectクラスのフルパスを求める
[code]
from tdkaoku.kaoku_core import(
Masterproject
)
import inspect
print(inspect.getfile(Masterproject))
[/code]
以下が出力される
[code]
C:\\OSGeo4W\\apps\\Python37\\lib\\tdkaoku\\kaoku_core.py
[/code]
QToolbarの色を設定
QWidget上にQToolbarを配置するとQToolbarが黒く表示されることがある
色を設定するにはQToolbarのsetStyleSheetを使用
toolbar = QToolBar(親のWidget)
toolbar.setStyleSheet(“background-color: rgb(240, 240, 240)”)
QgsFillSymbol の outline_width の デフォルト単位
QgsFillSymbolはポリゴンレイヤのシンボルとして使用する
QgsFillSymbolのインスタンスは通常QgsFillSymbolクラスのstaticな関数createSimpleで作成
[code]
kvs = {}
# 内部色
kvs[‘color’] = ‘0,0,0,0’
# 線色
kvs[‘outline_color’] = ‘255,0,0,255’
# 線幅
kvs[‘outline_width’] = ‘1’
# インスタンス作成
fillSymbol= QgsFillSymbol.createSimple(kvs)
[/code]
QgsFillSymbolのデフォルトの線幅の単位はミリメートルのためピクセル値で幅を設定するには単位をピクセルに設定する
[code]
kvs[‘outline_width_unit’] = ‘1’
[/code]
単位の定数
[code]
enum RenderUnit
{
RenderMillimeters = 0, //!< Millimeters
RenderMapUnits, //!< Map units
RenderPixels, //!< Pixels
RenderPercentage, //!< Percentage of another measurement (e.g., canvas size, feature size)
RenderPoints, //!< Points (e.g., for font sizes)
RenderInches, //!< Inches
RenderUnknownUnit, //!< Mixed or unknown units
RenderMetersInMapUnits, //!< Meters value as Map units
};
[/code]
ちなみにQGISではdpi=96なので25.4mm=96pix、よって1pixは0.26mm
※outline_widthのデフォルト値はqgis.hのDEFAULT_LINE_WIDTHであり0.26
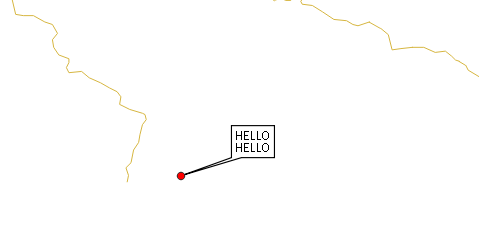
QgsTextAnnotationをadd
QgsTextAnnotationはQgsAnnotationから派生された地図上の注釈クラス
QgsMapToolAnnotationクラスのC++ソースを参考にPythonでQgsTextAnnotationをMapCanvas上に追加する
間違ったコード
[code]
txt = QTextDocument(‘HELLO\r\nHELLO’)
annotation = QgsTextAnnotation()
annotation.setDocument(txt)
mapPos = QgsPointXY(138.9776,35.6712)
annotation.setMapPosition(mapPos)
annotation.setMapPositionCrs(iface.mapCanvas().mapSettings().destinationCrs())
annotation.setRelativePosition(QPointF(0, 0))
#annotation.setFrameSize(QSize(100, 50))
annotation.setFrameSize(txt.size())
annotationManager = QgsProject.instance().annotationManager()
annotationManager.addAnnotation(annotation)
[/code]
※setMapPositionには緯度、経度をセットしているが必要があればMapCanvasのDestinationCrsの座標系に変換が行う。
全てのAnnotationはQgsAnnotationManagerのannotationsに入っている
[code]
annotations= QgsProject.instance().annotationManager().annotations()
for annotation in annotations :
print(annotation.document().toPlainText())
[/code]
座標を指定してMapCanvas上のAnnotationを照会するにはMapCanvasのitemsを使用する
[code]
items = iface.mapCanvas().items(QPoint(10,10))
for item in items :
if item.__class__.__name__ == ‘QgsMapToolAnnotation’ :
print(item.document().toPlainText())
[/code]
ところがここでitemsにQgsMapToolAnnotationが存在しない。
全てがQGraphicsItemになっている
どうやらPythonでQgsAnnotationをMapCanvasに追加するには「annotationManager.addAnnotation」ではなく
「QgsMapCanvasAnnotationItem」を使うみたい
正しいコード
[code]
txt = QTextDocument(‘HELLO\r\nHELLO’)
annotation = QgsTextAnnotation()
annotation.setDocument(txt)
mapPos = QgsPointXY(138.9776,35.6712)
annotation.setMapPosition(mapPos)
annotation.setMapPositionCrs(iface.mapCanvas().mapSettings().destinationCrs())
#annotation.setRelativePosition(QPointF(0, 0))
annotation.setFrameOffsetFromReferencePoint(QtCore.QPointF(30, 30))
#annotation.setFrameSize(QSize(100, 50))
annotation.setFrameSize(txt.size())
i = QgsMapCanvasAnnotationItem(annotation, iface.mapCanvas())
[/code]
setRelativePositionではなく、setFrameOffsetFromReferencePointを使用して吹き出しの位置を設定
参考
QGIS Pythonプラグインからユーザーライブラリを共有したい
複数のPythonプラグインから呼ばれるユーザーライブラリを作成する
「C:\OSGeo4W\apps\Python37\lib」フォルダに「mylibs」フォルダを作成
mylibsフォルダには空の__init__.pyファイルと関数、クラスを定義したmyfunc.pyファイルを作成
__init__.py
[code]
# -*- coding: utf-8 -*-
"""
__init__.py
"""
[/code]
myfunc.py
[code]
# -*- coding: utf-8 -*-
def myproc():
print(‘Hello’)
class MyClass:
def __init__(self):
self.name = ‘Hello’
def print_name(self):
print(self.name)
[/code]
QGISのPythonコンソールからの呼び出し
[code]
from test import myfunc
mc = MyClass()
from test.myfunc import MyClass
c = MyClass()
c.print_name()
[/code]
属性入力ダイアログのカスタマイズ
QGISの属性情報入力ダイアログはカスタマイズが可能
uiの指定

ダイアログ表示の際のカスタマイズコードの編集
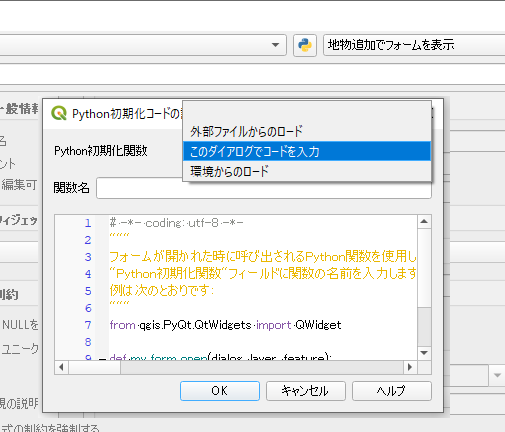
詳細はQGIS Tips – Custom feature forms with Python logic
PythonでカスタマイズするときはQgsEditFormConfigクラスを使用するみたい
Feature登録時に属性情報入力ダイアログを表示しない
Featureを登録すると通常は属性情報入力ダイアログが表示される。
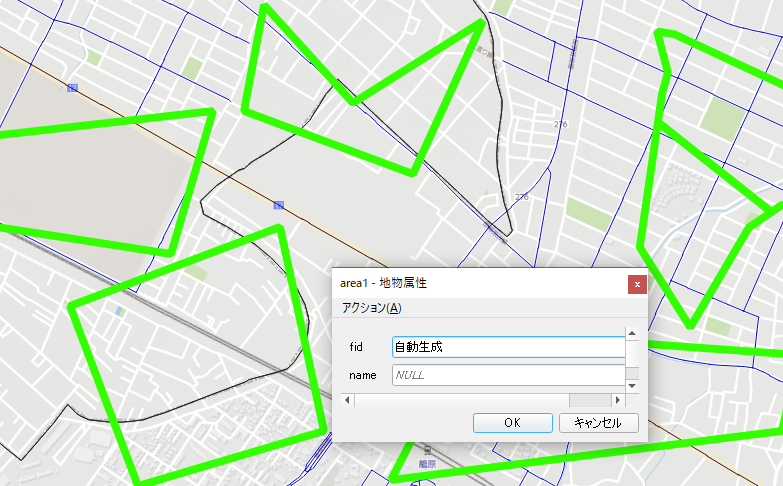
レイヤのプロパティでFeature登録時に属性情報入力ダイアログの表示/非表示を設定できる
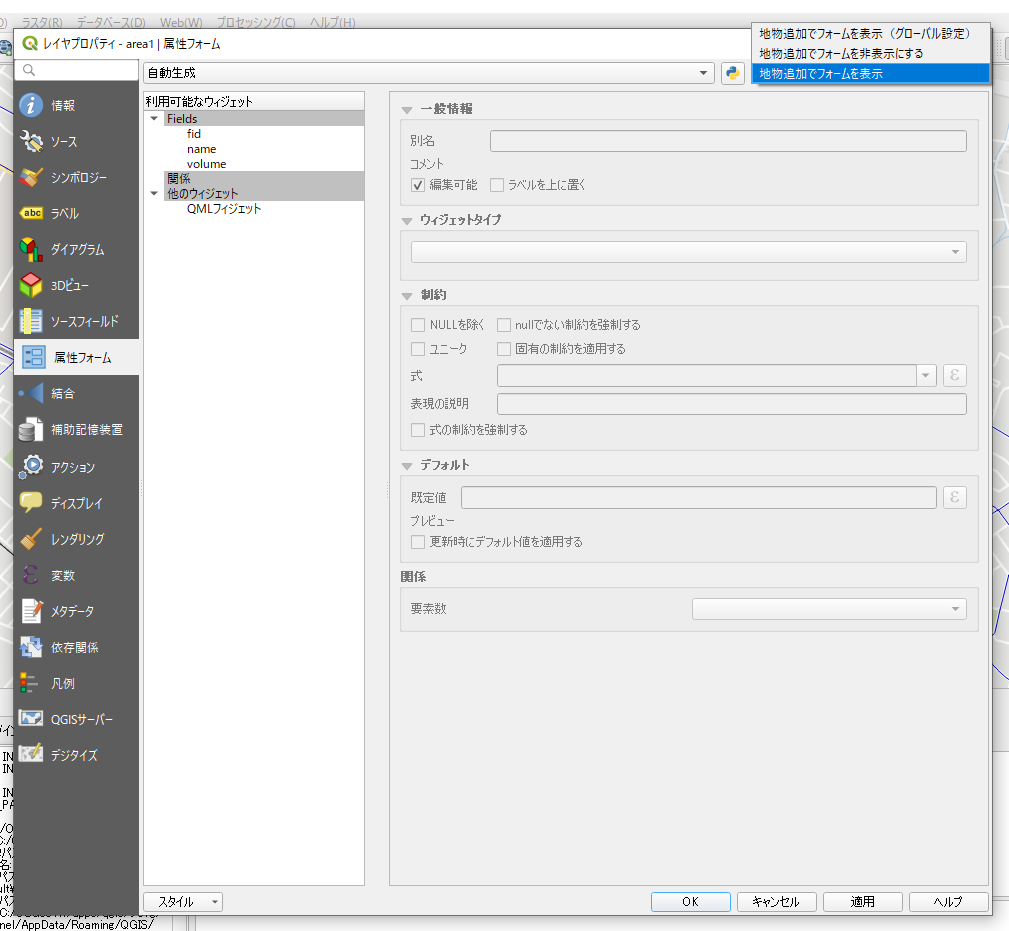
Pythonでの設定方法
属性情報入力ダイアログを非表示
[code]
layer = self.iface.activeLayer()
editFormConfig = layer.editFormConfig()
editFormConfig.setSuppress(QgsEditFormConfig.FeatureFormSuppress.SuppressOn)
layer.setEditFormConfig(editFormConfig)
[/code]
属性情報入力ダイアログを表示
[code]
layer = self.iface.activeLayer()
editFormConfig = layer.editFormConfig()
editFormConfig.setSuppress(QgsEditFormConfig.FeatureFormSuppress.SuppressOff)
layer.setEditFormConfig(editFormConfig)
[/code]
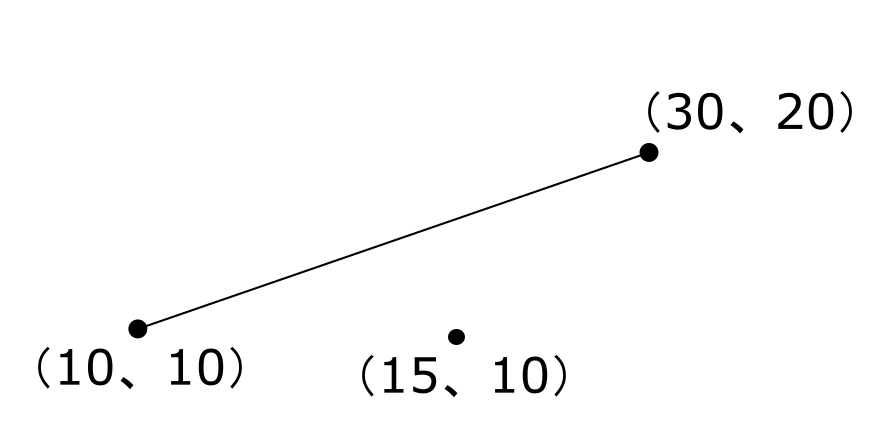
線分と点の最短距離
[code]
points=[]
point = QgsPoint()
point.setX(10)
point.setY(10)
points.append(point)
point = QgsPoint()
point.setX(30)
point.setY(20)
points.append(point)
line = QgsLineString()
line.setPoints(points)
point = QgsPoint()
point.setX(15)
point.setY(10)
p = QgsGeometryUtils.closestPoint(line, point)
p
<QgsPoint: Point (14 12)>
[/code]