ホーム » Python (ページ 4)
「Python」カテゴリーアーカイブ

メモリレイヤを追加
[code]
layer = QgsVectorLayer(‘Point?crs=epsg:4326’, ‘test_layer’, ‘memory’)
project = QgsProject.instance()
project.addMapLayer(layer)
[/code]
QgisInterfaceクラスのaddVectorLayerを使用してもよい
属性追加はlayer.addAttributeを使用
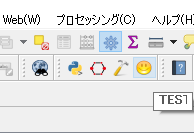
QGIS3のツールバーにボタンを追加
既存のプラグインツールバーにボタンを追加
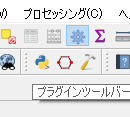
今回はプラグインのinitGuideでツールバーにボタンを追加しボタンが押されたらメッセージボックスを表示
インポートを追加
[code]
from PyQt5.QtWidgets import QMessageBox, QAction
from PyQt5.QtGui import QIcon
[/code]
[code]
def initGui(self):
"""Create the menu entries and toolbar icons inside the QGIS GUI."""
testAction = QAction(QIcon(os.path.dirname(__file__) + ‘/niko.png’), ‘TEST’, self.iface.mainWindow())
testAction.triggered.connect(self.test)
self.iface.addToolBarIcon(testAction)
def test(self):
QMessageBox.about(self, "Title", "Message")
[/code]
QGISのメニューをPythonから操作
プロジェクトを開くメニューを呼び出す
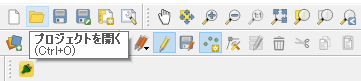
[code]
actionOpenProject = iface.actionOpenProject();
actionOpenProject.trigger()
[/code]
地物の登録
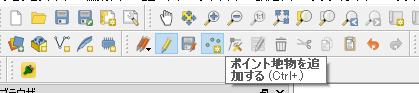
[code]
actionAddFeature = iface.actionAddFeature();
actionAddFeature.trigger();
[/code]
事前にPOINTレイヤを選択していたらポイントの登録メニューを呼び出す
QGIS3 plugin おさらい
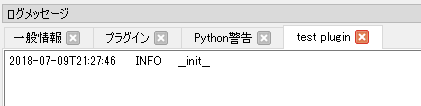
ログの出力
from qgis.core import *
QgsMessageLog.logMessage(“__init__”, ‘test plugin’, Qgis.Info)
メッセージレベルの定数が変更
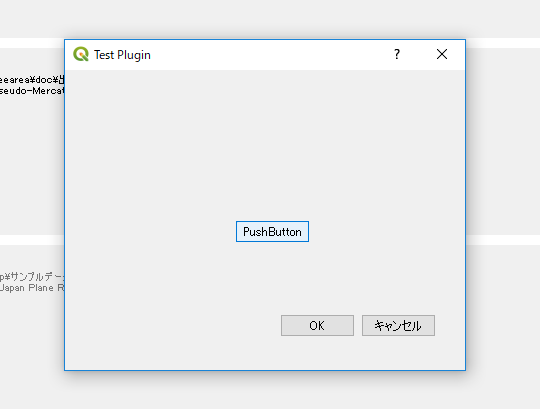
ダイアログのカスタマイズ
QT Creatorでtest_plugin_dialog_base.uiを開きボタン「btnTest」を追加
通常はQT Creator上でbtnTestのシグナルとスロットの設定を行う。
今回はプログラムで対応。
test_plugin_dialog.pyを編集
[code]
class TestPluginDialog(QtWidgets.QDialog, FORM_CLASS):
def __init__(self, parent=None):
"""Constructor."""
super(TestPluginDialog, self).__init__(parent)
# Set up the user interface from Designer.
# After setupUI you can access any designer object by doing
# self.<objectname>, and you can use autoconnect slots – see
# http://qt-project.org/doc/qt-4.8/designer-using-a-ui-file.html
# #widgets-and-dialogs-with-auto-connect
self.setupUi(self)
self.btnTest.clicked.connect(self.pushButton)
def pushButton(self):
self.close()
[/code]
以上の編集を終了したらQGIS再起動で動作確認(makeは不要)
pyQt4の頃はself.btnTestではなくself.ui.btnTestだったような
スロットの前には@pyqtSlot()を付けたような
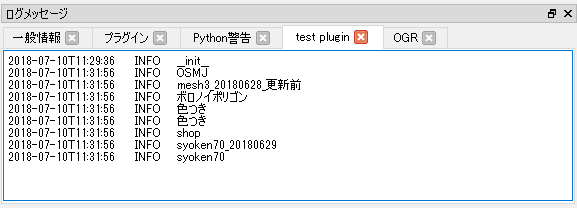
レイヤの一覧を出力
ボタンが押されたらレイヤの一覧をログに出力
[code]
def pushButton(self):
for layer in QgsProject.instance().mapLayers().values():
QgsMessageLog.logMessage(layer.name(), ‘test plugin’, Qgis.Info)
[/code]
QGIS3のプラグイン
QGIS2からQGIS3に変更されたことに伴い、プラグインに変更があったので再度確認!
開発環境のセットアップ
※環境はWin10
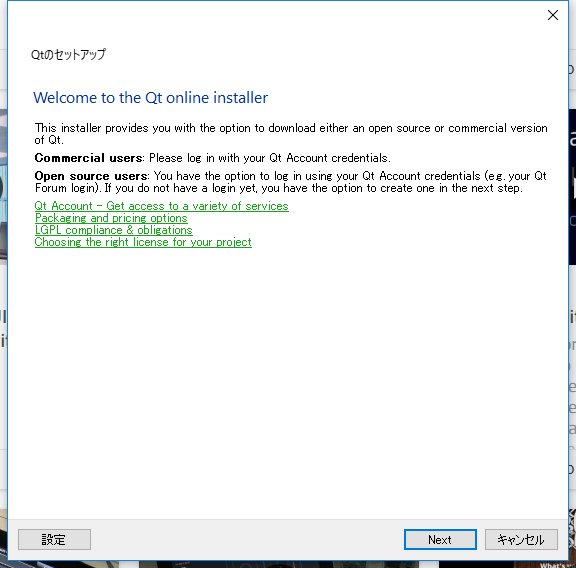
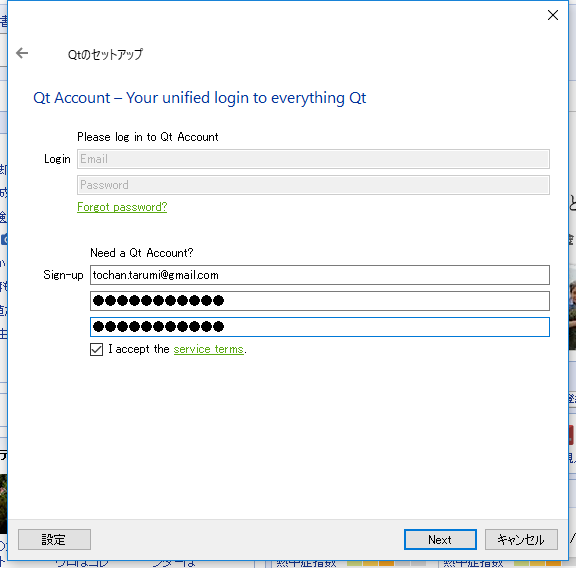
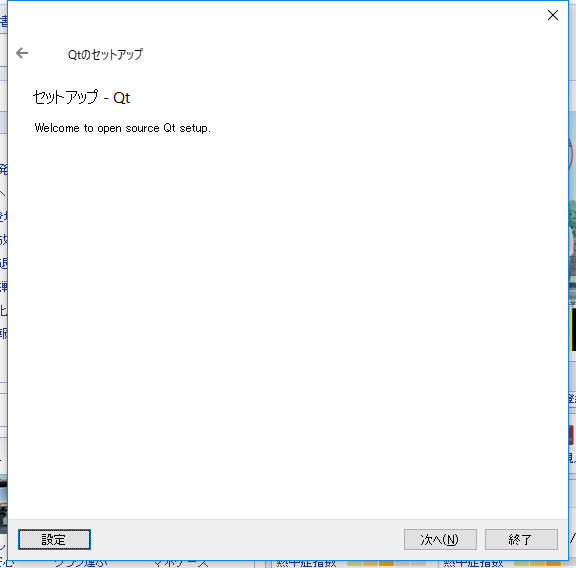
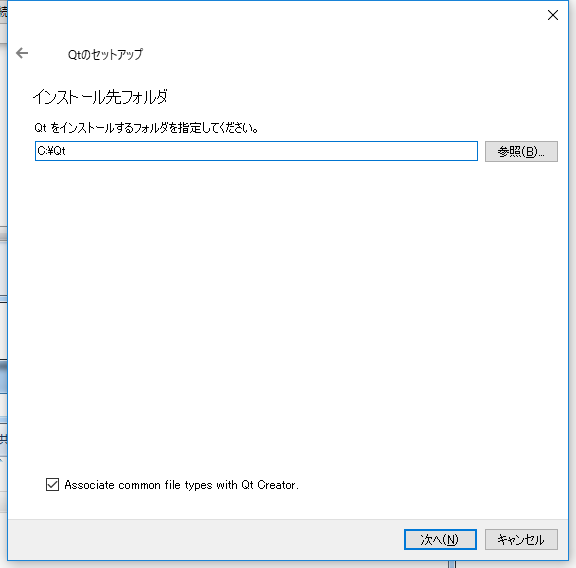
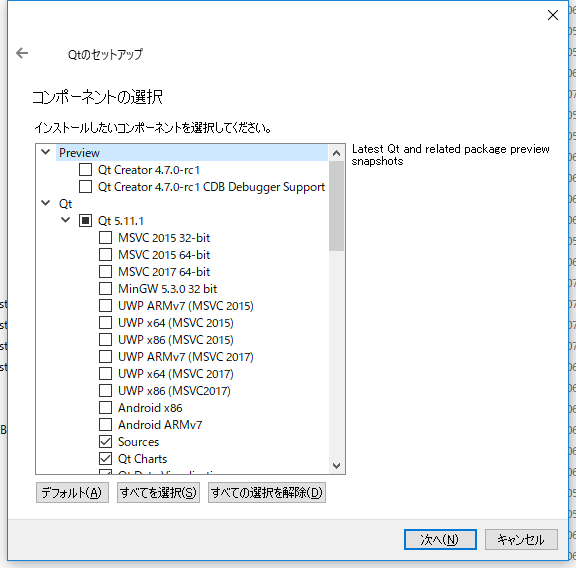
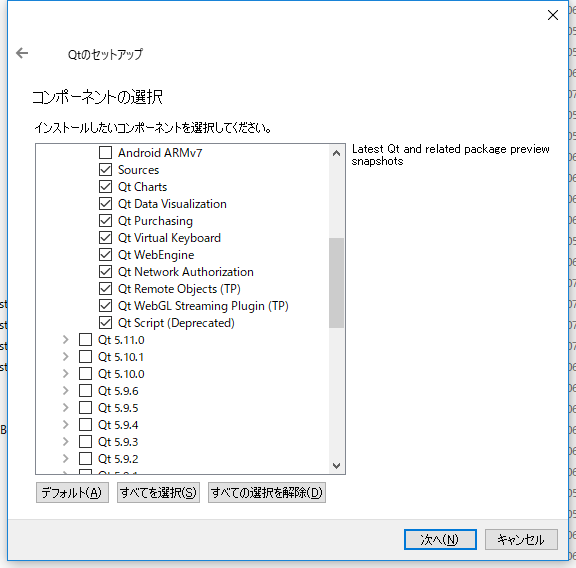
Qt Creatorのインストール
QTのインストーラー「qt-unified-windows-x86-3.0.5-online.exe」をダウンロードしてインストールを実行
インストールするファイルはとりあえず最小限とする。
QTにアカウントを作成
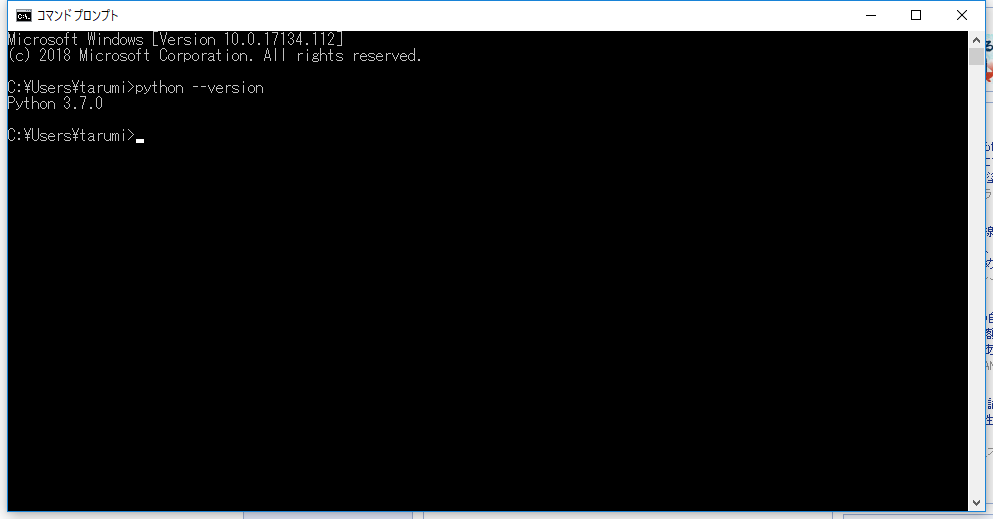
Python3をインストール
Python3-3.7.0-amd64.exe( Windows x86-64 executable installer)をダウンロードして実行。
インストールが完了したらバージョンを確認して正しくインストールされていることを確認
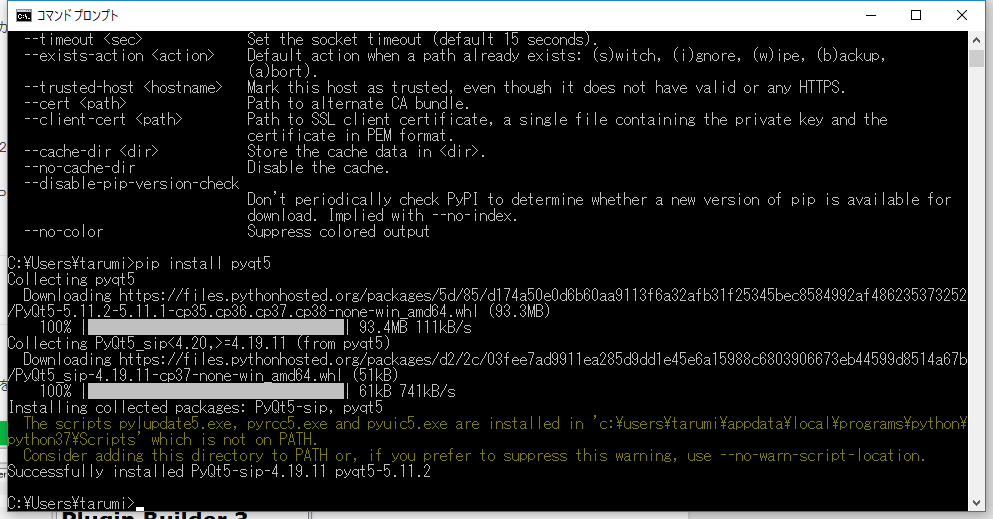
pyqt5をインストール
pip3コマンド(python3のパッケージ管理システム)を使ってインストール
GNUのmakeコマンドをインストール
Make for WindowsのサイトよりComplete package, except sourcesをダウンロードしてデフォルトのフォルダ(C:\Program Files(X86)\GnuWin32)にインストールしC:\Program Files(X86)\GnuWin32\binにPATHを通す。
以上で環境の構築は終了
とりあえず、Plugin Builderを起動してサンプルとなるPlugin(今回はべたなTest Plugin)を作成
作成したPluginフォルダをカレントにしてmakeコマンドを実行
makeコマンドの出力結果
[code]
pyrcc5 -o resources.py resources.qrc
[/code]
pyrcc5コマンドでQtのリソースファイルをPythonファイルに変換している。
resources.qrcの内容
[code]
<RCC>
<qresource prefix="/plugins/test_plugin" >
<file>icon.png</file>
</qresource>
</RCC>
[/code]
以上のファイルをプラグインのフォルダに配置
[code]
C:\Users\ユーザー名\AppData\Roaming\QGIS\QGIS3\profiles\default\python\plugins
[/code]
QGISを起動するとプラグインが追加されている

参考にしたサイト
Quick Guide to Getting Started with PyQGIS 3 on Windows
QGIS3 wiki Some hints for porting QGIS 2 plugins to the new API of QGIS 3.
Porting QGIS plugins to API v3 – Strategy and tools
stackexchange Make QGIS python plugin for both versions 2.x and 3.x?
書籍 The PyQGIS Programmer’s Guide
PYTHONのバージョン確認
python.exeを実行すると表示される。
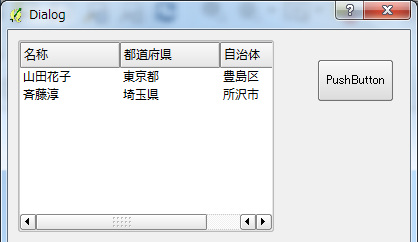
PythonとQtでListView
VisualStudio等で開発しているとおなじみのListView
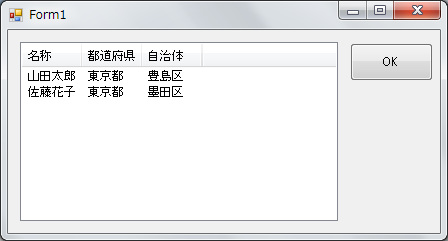
これをQTで実現するにはQTreeViewを使用する。
QtデザイナでダイアログにTreeViewを配置して以下のコードを実装。
        model = QStandardItemModel(0,3)
        model.setHeaderData( 0, Qt.Horizontal, ('名称').decode('utf-8'))
        model.setHeaderData( 1, Qt.Horizontal, ('都道府県').decode('utf-8'))
        model.setHeaderData( 2, Qt.Horizontal, ('自治体').decode('utf-8'))

        self.ui.treeView.setRootIsDecorated(False)
        self.ui.treeView.setItemsExpandable(False)
        self.ui.treeView.setModel(model)
        # view.setUniformRowHeights(True)
        model.setItem( 0, 0, QStandardItem(("山田花子").decode('utf-8')))
        model.setItem( 0, 1, QStandardItem(("東京都").decode('utf-8')))
        model.setItem( 0, 2, QStandardItem(("豊島区").decode('utf-8')))
        model.setItem( 1, 0, QStandardItem(("斉藤淳").decode('utf-8')))
        model.setItem( 1, 1, QStandardItem(("埼玉県").decode('utf-8')))
        model.setItem( 1, 2, QStandardItem(("所沢市").decode('utf-8')))
Python メモ
文字列に変換
[code]
str(変数)
[/code]
配列(リスト)
初期化
[code]
lists = []
list = ["taro","hanako"]
[/code]
追加
[code]
lists.append("saito")
[/code]
繰り返し
[code]
for l in lists:
print l
[/code]
よくあるインデックスをインクリメントしながらの繰り返し(idx=0から10)
[code]
for idx in Range(0, 10):
print idx
[/code]
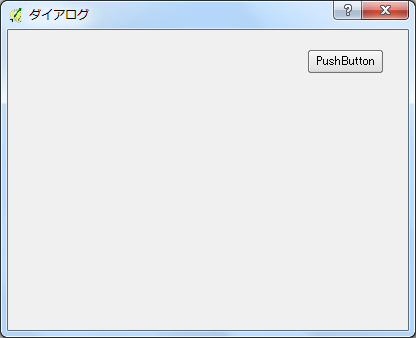
PythonとQtでダイアログ表示
Pythonを使ってQGISのプラグインを作るにあたり、QTダイアログについて調べる
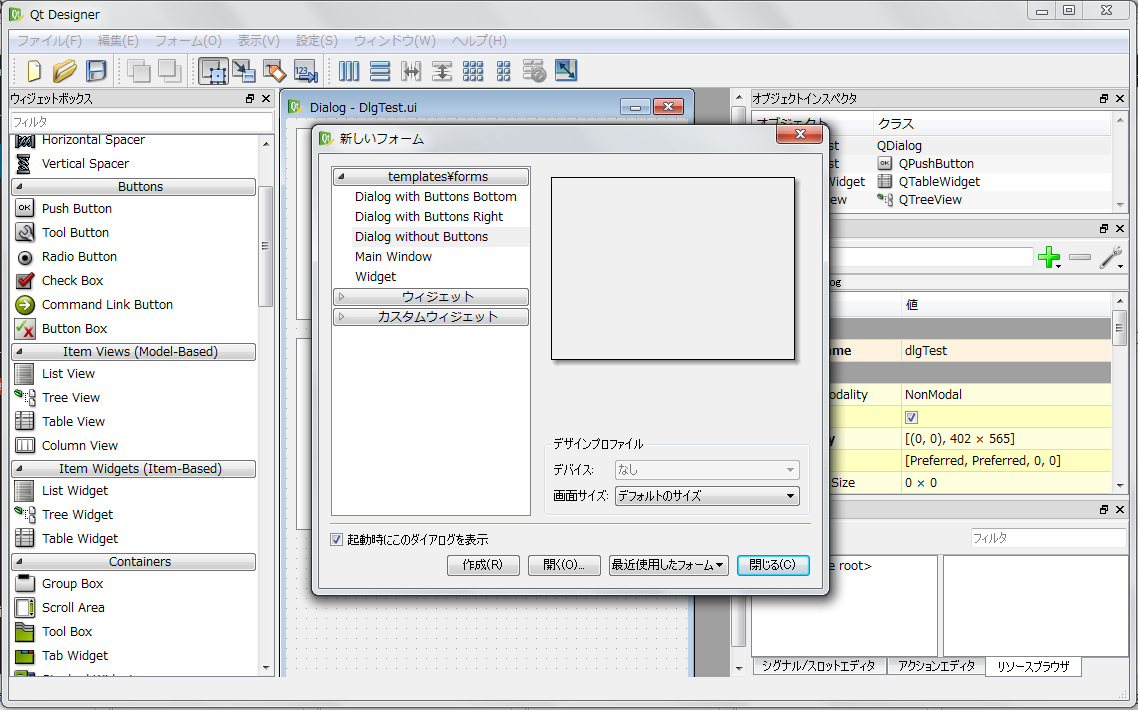
QTデザイナを起動して「新規作成」→「Dialog without Buttons」を選択。
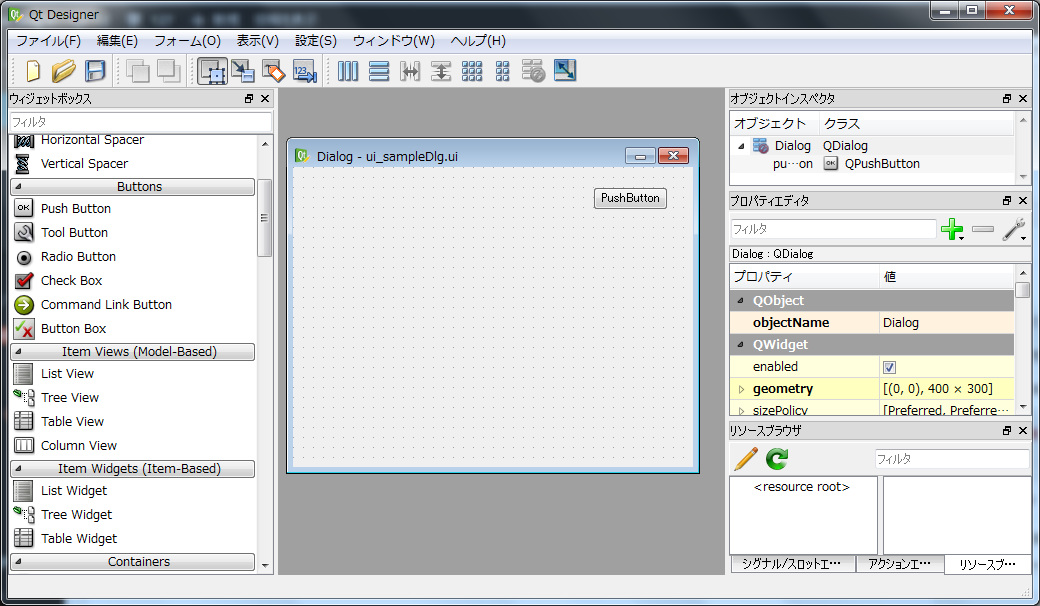
ボタンを配置し、ui_sampleDlg.uiに保存。
pyuic4を使用してuiファイルをPythonファイルに変換
pyuic4 ui_sampleDlg.ui -o ui_sampleDlg.py
※pyuic4.batを使うためにC:\OSGeo4W\binにPATHを通す。
環境変数PYTHONHOMEが設定されていなければpyuic4.batに以下の行を追加
SET PYTHONHOME=C:\OSgeo4w\apps\Python27
変換後のui_sampleDlg.py
# -*- coding: utf-8 -*-

# Form implementation generated from reading ui file 'ui_sampleDlg.ui'
#
# Created: Sat Apr 23 07:01:53 2016
#      by: PyQt4 UI code generator 4.11.3
#
# WARNING! All changes made in this file will be lost!

from PyQt4 import QtCore, QtGui

try:
    _fromUtf8 = QtCore.QString.fromUtf8
except AttributeError:
    def _fromUtf8(s):
        return s

try:
    _encoding = QtGui.QApplication.UnicodeUTF8
    def _translate(context, text, disambig):
        return QtGui.QApplication.translate(context, text, disambig, _encoding)
except AttributeError:
    def _translate(context, text, disambig):
        return QtGui.QApplication.translate(context, text, disambig)

class Ui_Dialog(object):
    def setupUi(self, Dialog):
        Dialog.setObjectName(_fromUtf8("Dialog"))
        Dialog.resize(400, 300)
        self.pushButton = QtGui.QPushButton(Dialog)
        self.pushButton.setGeometry(QtCore.QRect(300, 20, 75, 23))
        self.pushButton.setObjectName(_fromUtf8("pushButton"))

        self.retranslateUi(Dialog)
        QtCore.QMetaObject.connectSlotsByName(Dialog)

    def retranslateUi(self, Dialog):
        Dialog.setWindowTitle(_translate("Dialog", "Dialog", None))
        self.pushButton.setText(_translate("Dialog", "PushButton", None))
作成したユーザーインターフェイスを呼び出すクラスをQDialogから派生して作成
クラス名はSampleDlg、ファイル名はSampleDlg.pyとする。
※ifaceは
# -*- coding: utf-8 -*-

# Form implementation generated from reading ui file 'DlgTest.ui'
#
# Created: Wed Apr 20 16:59:11 2016
#      by: PyQt4 UI code generator 4.11.3
#
# WARNING! All changes made in this file will be lost!

from PyQt4.QtCore import *
from PyQt4.QtGui import *
from qgis.core import *
from ui_sampleDlg import Ui_Dialog

class SampleDlg(QDialog):

    def __init__(self, iface):
        QDialog.__init__(self)
        self.iface = iface
        self.ui = Ui_Dialog()
        self.ui.setupUi(self)
プラグインからSampleDlgクラスの表示
from SampleDlg import SampleDlg
dlg = SampleDlg(self.iface)
dlg.show()
dlg.exec_()
以上で正しく表示される
次はボタンが押されたらダイアログを閉じるように設定
SampleDlgクラスでボタンのシグナル引っ掛けてダイアログのcloseを呼ぶ
class SampleDlg(QDialog):

    def __init__(self, iface):
        ・・・
        QObject.connect(self.ui.pushButton, SIGNAL("clicked()"), self.pushButton)

    @pyqtSlot()
    def pushButton(self):
        self.close()
以上で終了